Ah, before I leap into describing my rough and ready method of producing nectar from apples I must first add a couple of items that I had over looked when listing the sundry items required in part 2. The first of these is a funnel and the second is a small diameter length of tubing being of about 4mm in diameter. Again please remember to ensure that you have cleaned all items thoroughly, I do not use preservatives in this method so to avoid disappointment please clean and clean again.
Stage 1, Mulching.
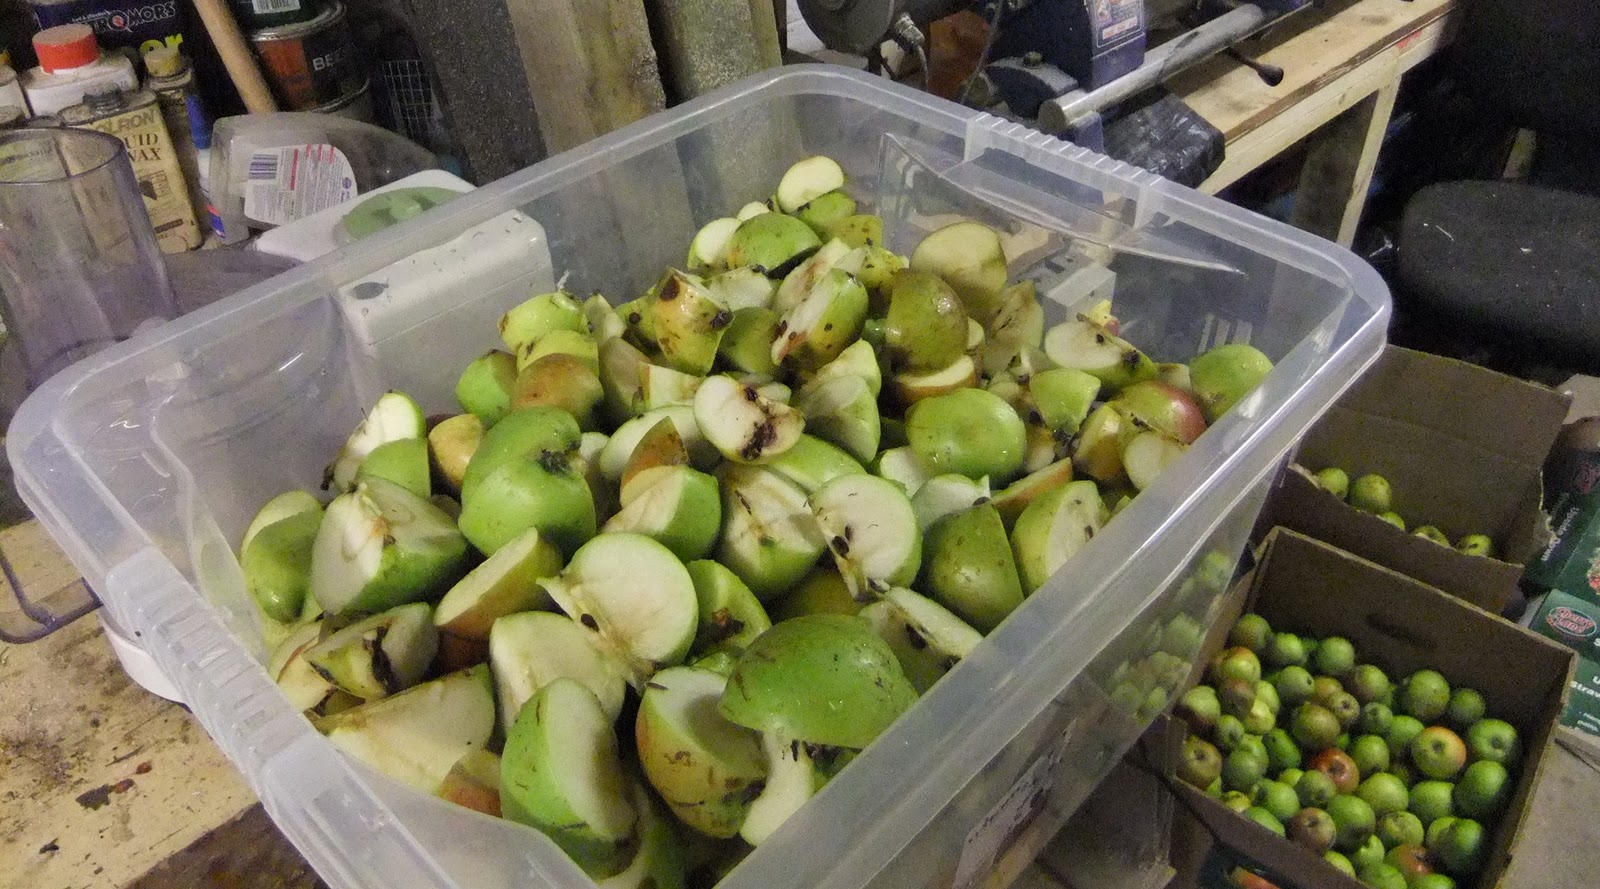
After cleaning your equipment the first stage is to prepare your hard won apples for pressing. I call this mulching, I know that it’s not the correct terminology but this is my write up and I happen to like the word mulch! Basically what we are aiming here for is to reduce the apples into mulch that can be pressed easily so releasing the apples’ juice.
I prefer to wash the apples simply in cold water before use; this is to remove any detritus and chemicals that may be on the outer skin of the apple. As I mentioned in part 2 this is traditionally done by first roughly segmenting the apples and then pounding them to a thick pulp with a piece of suitable timber. This works fine, but for an out of condition and rather rotund Hobbit like myself it is rather knackering. The method that I employ at the moment is to quarter the apples (6ths if large apples) and then used a food blender to reduce the apples to the desired consistency. The reason for segmenting the apples in this case is to simply allow them to be fed easily into the blender. The consistency should resemble small chucks of apples and you should not process them too much so that it resembles a paste!

Stage 2, Pressing.
The press itself is simplicity itself consisting of few parts, which briefly are the ‘pan’ complete with threaded shaft;

The ‘basket’, vertically slatted hardwood strips held together with metal bands (open top and bottom);

And finally the hardwood pieces and ‘capstan’ for the applying of pressure to the mulch;

The ‘basket’ sits on top of the ‘pan’ which in turn I position so that the lip of the ‘pan’ overhangs above a suitable container for the collection of what will hopefully be a torrent of apple juice.

Over the collection container I stretch a course net to catch any bits of apple that escape the press. This is in turn held in place by some ancient table cloth weights.
Once set up it is now just a simple case of loading the ‘basket’ to the top with the apple mulch. Place the two semi circular press pieces on top followed by the spacing pieces at 90 degrees. The pressure pad comes next (metal plate up) and then all that is left is to screw the ‘capstan’ down applying pressure, as the plates are forced downwards more pressure is applied by the use of a bar to turn the ‘capstan’.


The feeling of achievement that I get when the first drops of juice make their way into the pan and then start dripping like a cold nose on a winters morning is something else (sad I know). As more pressure is applied the drip soon becomes a steady flow and my smile does tend to get a little bigger.


Once the ‘capstan’ reaches its lowest point allow the juice to run until it basically stops. Unscrew the ‘capstan’ and remove the pressing plates, add more mulch to the top of the pressed mulch and repeat the pressing. I tend to repeat this one more time, ant more than this I find that the pressed mulch is difficult to remove from the basket. So after three pressings lift the basket and empty the ‘cake’ (the pressed mulch) into a clean container. Do not discard it just yet for if you find yourself short of a little juice some more can be obtained from repressing the ‘cake’. Repeat this ‘pressing’ process until all your apples are used or until you have obtained sufficient juice. As a rule of thumb it takes about 16 to 20lb of apples to make a gallon of juice.
Stage 3, Additives;
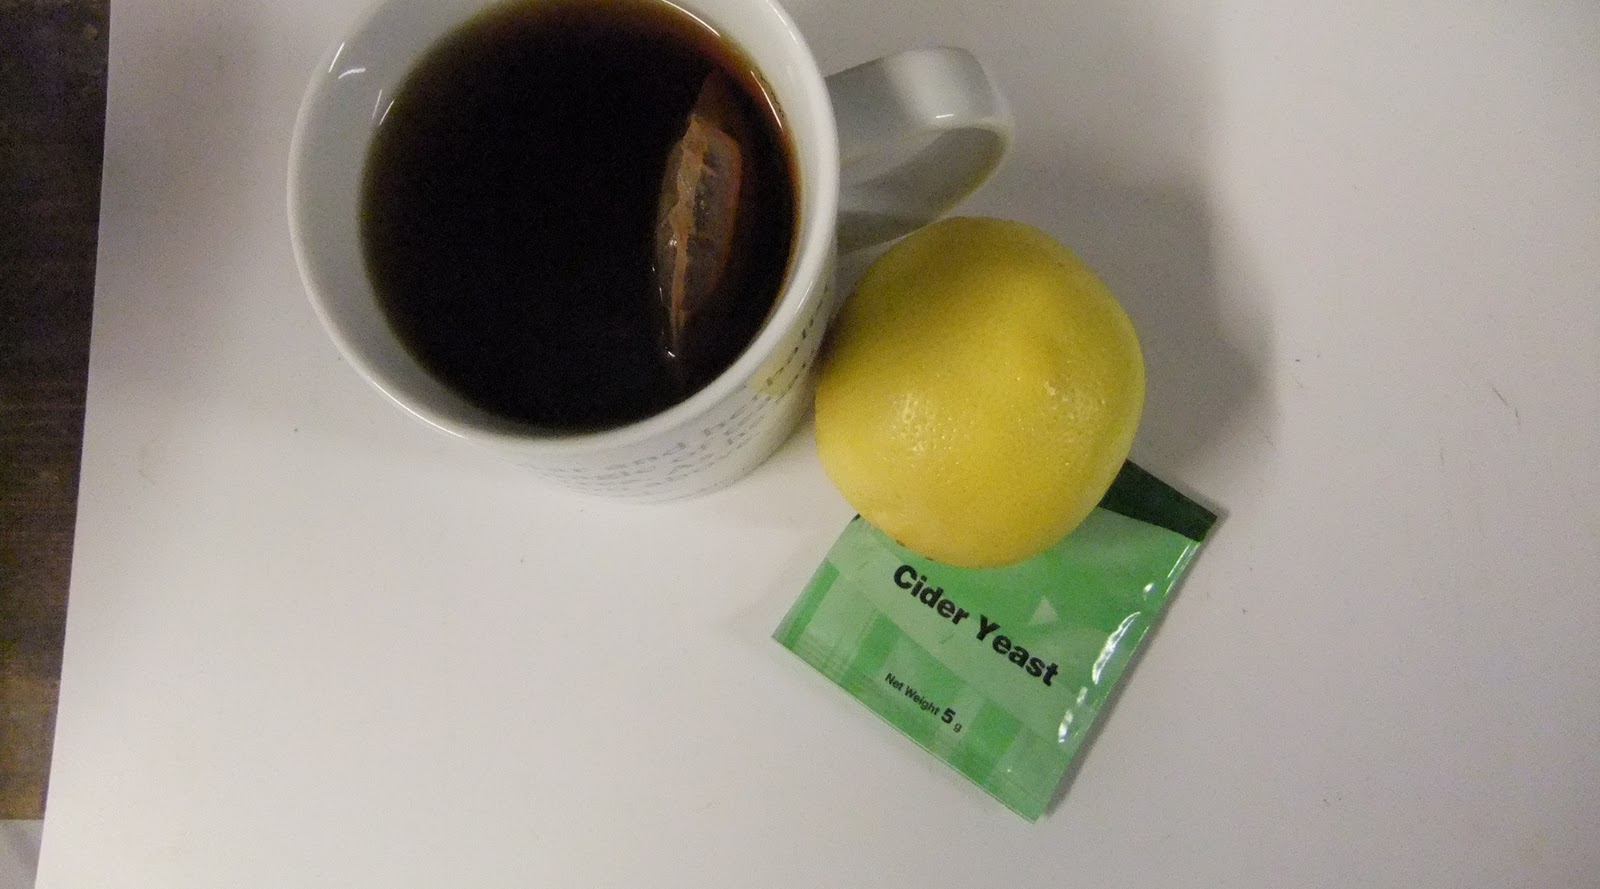
As earlier mentioned in part 1 the ingredients used here are simple with no chemicals and the like. Once you've obtained your juice add the juice of 1 lemon to about every 3 gallons of apple juice. I must admit to a slight cheat at this point as I do not squeeze my lemons for their juice (oh err missus), but I slice sufficient lemons and add them to the blender as I’m processing the apples.
Also to be added is a mug of cold, black tea for every couple of gallons of apple juice (about a 6th of a gallon) for tannin. Stir this in well and then add the yeast, the packet of yeast should come with manufacturers instruction upon the quantity of yeast required per gallon of juice. Allow the yeast to float on the top of the juice for about 10 minutes and then stir in.
Stage 4, Fermentation;
You can now transfer the juice to your demy johns. What I tend to do is line the demy johns up and fill them at the same time.

What I mean to say is that I’ll pour one jug of juice into the first demy john then move to the next and pour a jug of juice into this one. Moving along the demy johns this way means I get an even ‘mixture’ of the juice into each one as I find that the yeast does have a tendency to drop to the bottom of the juice even with stirring. I stir the juice after each round of jug pouring and repeat this until the demy johns are filled to just above their shoulder. It’s at this point if you find that you have miscalculated your quantity of juice and are a little short that the ‘cake’ can be repressed to obtain more juice. It does take more effort the second time of pressing but it is better than being short of juice.
The demy johns can now be closed off using a rubber bung with a hole through it and air lock assembly. At this point it may be worth noting that I do not just put water into the airlock but water that has been boiled and allowed to cool. Another point is that I cover the open top of the airlock with lint free cloth, held by cotton or an elastic band to prevent detritus or insects entering the airlock. All being well by the next morning you should have the satisfaction of seeing your airlock releasing bubbles of gas from the demy john. During the natural process of the yeast consuming the sugar within the apple juice it produces two waste products; alcohol and carbon dioxide, this is the gas you see bubbling through the air lock.
The time for which the juice continues to ferment can depend upon a few factors; amount of natural sugar in the juice, temperature, amount and strain of yeast etc. This may take from two to several weeks. As the juice ferments the appearance will change from that of something that may have been expelled from an effluent plant to a clearing and pleasing golden colour.
As this happens keep an eye on the fluid in the air lock and the rate of bubbles passing through it. As the rate slows to a hardly discernable flow or stops completely it is now the time that I bottle the juice.
Stage 5, Bottling;
Bottling is straight forward enough and I just siphon off from the demy john to the bottles. I personally do not rack demy johns off from one to another to help clear the sediment formed during the fermentation process. It’s not because I’m lazy, well not just because, but I prefer to leave the juice well alone and reduce the risk of contaminating it by say dirt off my hand. This does leave sediment at the base of the vessel so care has to be taken not to use a tube of too great of a diameter, hence keeping the flow rate slow and also keep the tube a little above the sediment.


At this point there is a choice to be made about your end product in that you can have flat cider, preferred by some or, like myself, carbonated cider (cider with fizz n bubbles). This again is simple enough as if flat cider is required then the juice can be siphoned directly into your bottles. If carbonated is required then add a level tea spoon of sugar (caster sugar dissolves faster) into each litre bottle before filling. For this I use a dry funnel so as to avoid getting sugar around the bottle’s top or neck. The adding of this sugar achieves carbonation simple by giving the remaining yeast a small amount of sugar to feast upon producing some more alcohol but more importantly now some more carbon dioxide. Because the bottle is now sealed the gas produced cannot escape and the pressure increase forces the gas to be absorbed into the liquid to be released once you open your bottle of cider with a satisfying ‘pop’.
If all goes well your cider will be drinkable in 6 months (a tad earlier if you really cannot wait) but I left mine for 10 months after bottling. A word of caution though, because of the lack of any preservatives in this method it is not wise to leave it anymore than about 12 months after bottling with it then being at risk of ‘going off’. This method, for me, produced an extremely drinkable, dry, cider which without being biased I preferred to many of the shop bought labels. I like it chilled from the fridge and it did have quite a kick, enough to redden my face a tad after a glass or two. Any who sampled it drained their glass holding it up for more and I simply could not ask for a better endorsement than that.
So there we have it, cider the Murphyfish way. If you have any questions or points of improvement to put across please feel free to comment. I know that to some of you this seems a rough and ready way to produce cider and the purest may well be now a wailing and gnashing their teeth, but it is, like me, rugged, simple and honest. Funny, it is hard to believe that a grease monkey like me can turn effluent into this;
As tradition dictated my last bottle from last year was drank as I crushed the first of this year’s apples, simple but strangely rewarding for me. I hope that you’ve enjoyed this straying from my usual meanderings, and ‘till the next time take good care of you and yours my friends.
John
16 comments:
It takes me about a month for me to sip a gallon of red wine before bed. I'm saving the jugs now. You've convinced me that it's time to go back into the wine business. It's been (Gasp!) 40 years!
John, I love the projects you do. Your true Polymathic man at heart I think. Great info here!
Bill
Please wrap and pack carefully, and ship here post haste.
John - be sure to check in at the OBN TODAY if possible - a UK Only gear offering
Thank you for the How-to-make hard cider. Makes me want to have a taste of the finished product. Looks rewarding...
now Johnno
are we having "part 4" soon?
pictures of you pissed as a fart?
Mr. Smythe - It'll be like riding a bike my good man, even after the extended break! or should that be falling off a bike?
Bill, I'm not sure about being polymathic man, I really feel that I'm just starting to learn about life but thank you for the kindness.
Hey Laurie,
Do they let toxic brewed stuff through customs?
CD gardens, well I'm glad that you've enjoyed this now all you have to do is go out and get some apples ;-)
Anon who ever you are, I'll check it out once finished here, thanks for the heads up.
Now John you'll have to wait until the cider has matured some - are you not reading these instructions fully?
Sounds like a lot of work, but worth it to make your own, chemical free. Nice going. Love the pic of all the "golden" bottles!
To be honest, Karen as long as you get into some sort of rhythm it's not bad at all. About I took a decent photo!
Thanks John... Now I have another project to add to my already long list of things to make... lol...
Karl.
Great stuff my friend, look forward to comparing samples with you at some point soon.
I have to say you are much more fastidious than me, I rely on the alochol to do a lot of the sterilising for me.
One note on how you work, if you want fizzy cider, get yourself a large fermenting bin, put all your sugar in as little boiled water as it takes to disolve and put this in the bin, then syphon all your cider into this bin. With luck the currents set up in the liquid mix everything enough without introducing too much oxygen and you end up with a much more consistent result, ie each bottle should be primed equally. It's a bit hit and miss as well as time consuming doing each bottle at a time!
I have plans to build a real press for next year. Watch out for it.
As to keeping that last bottle for the first pressing? Bugger.
Post a Comment